As you create a new event you will have the option to Add an RSVP. You will then be able to customize this option and monitor the responses once the event is approved. You may use an automated RSVP form, create your own, or use one created with another system. You can also add an RSVP to a previously created event.
If you use an automatic form:
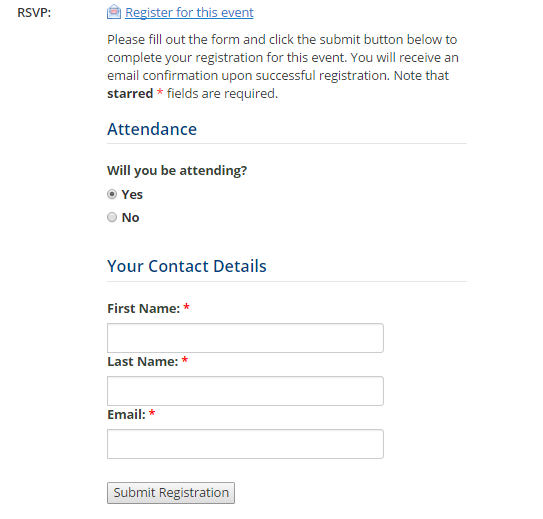
This is how your automatic form will appear

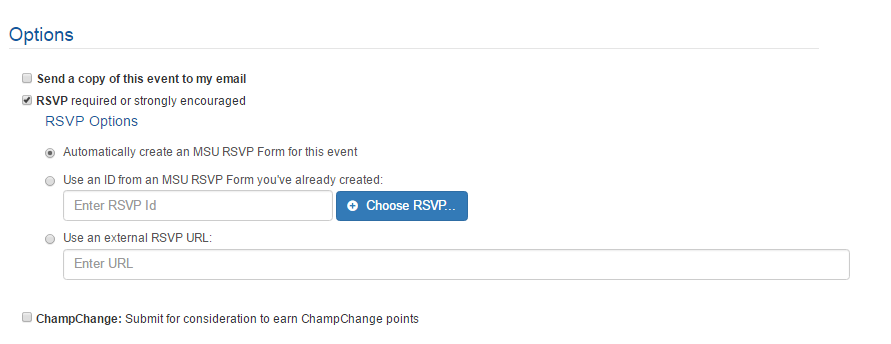
- In the Create New Event form, scroll to the Options section at the bottom.

- Select Add an RSVP to this event.
- Select Automatically create an MSU RSVP Form.
- Finish creating your event and click Create Event.
- Once approved, viewers will be able to RSVP by opening your event from the MSU Calendar. They will be prompted to answer if they will attend, as well as provide their name and contact information.
Once created, you can monitor your RSVP responses through the RSVP System.
If you wish to create your own:
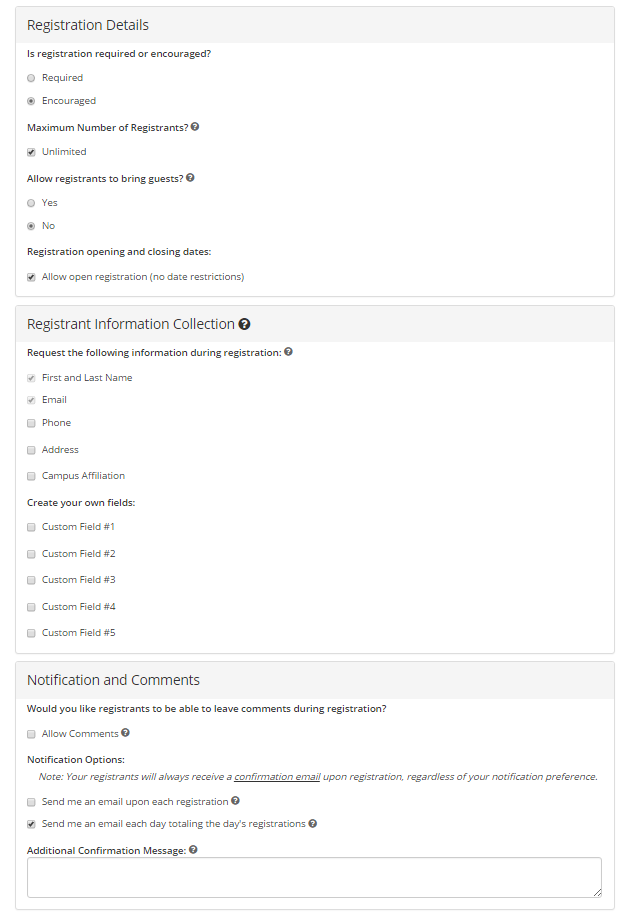
This is an example of how your form might appear. You may customize a number of options to make the RSVP fit your needs, to include options like required registration, a maximum number of available spaces, and email notifications when a user has registered.

- Before creating your event and while logged in to the COPE system, select RSVP System from the main navigation bar.

- Click Create New Event Registration in the upper right-hand corner of the main screen.
- Provide your RSVP event’s details, noting that a start date and time is required for your RSVP.

- Once you have created your RSVP, from the main navigation bar click the navigation dropdown and select Calendar.

- Click Create New Event and provide your event details.
- Under Options, select Add an RSVP to this event.
- Select the box Use an ID from an MSU RSVP Form you’ve already created.
- Enter your RSVP ID (found when viewing your RSVPs in the RSVP System) or click Choose RSVP.
- Create your event.
- Once approved, viewers will be able to RSVP by opening your event from the MSU Calendar.
Once created, you can monitor your RSVP responses or edit your RSVP form through the RSVP System.
If you use an externally created form:
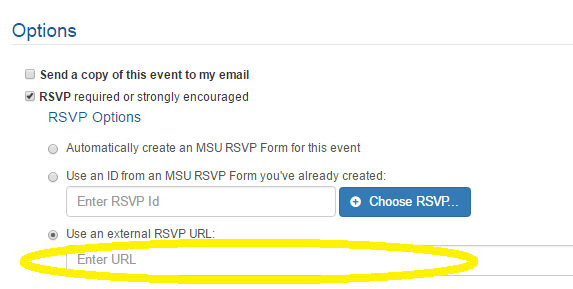
This option can be used if you have created an RSVP form through another application. Simply copy your RSVP URL into the URL box.