Table of contents
Your index file (index.pcf) is similar to the chapter overview at the beginning of a chapter in a book. In some instances, you may only need this one page. However, if you would like to add pages to the website, there are several ways to do so.
Before creating new web pages, make sure you've gone through The Pages view: how to organize website images, documents, and pages in the CMS.
If you would like to add pages to the site and they require no further organization, you can add additional pages directly.
If you would like to add multiple pages to the site and further organize, you can add site sections, essentially creating chapters in the book that is your website.
File names and page names are case-sensitive. use lowercase at all times. If you switch back and forth, this will have repercussions later when you want to share your website with others. Also, note for spaces it is generally best practice to use a hyphen ( - ).
Adding a site section
- Log in to the CMS by navigating to a page on your website and clicking the Direct Edit link.
- Click Content then Pages.
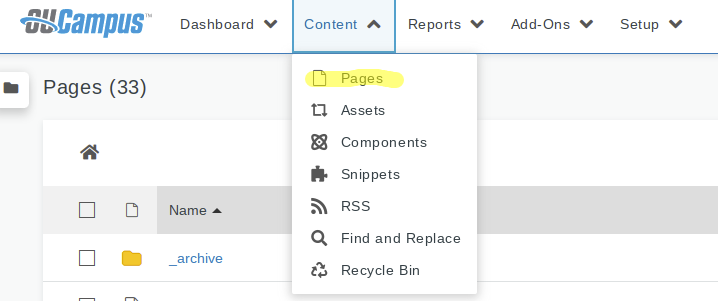
- Click New in the upper right-hand corner of your screen.

- Select New Section with Index File.

- You will be asked to provide information for this new section. You may give the section a name as well as give the new index file a page name. Note this new index file serves a similar purpose to the index file of your website — it is like the overview page of the site section.
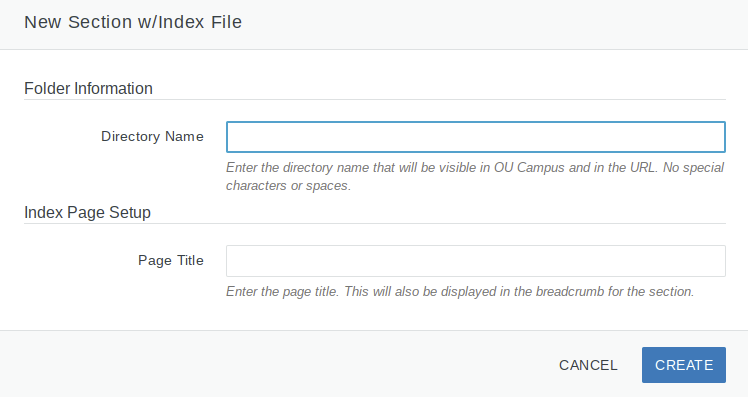
- Click Create.

- From here you may add additional pages to the site section or create more site sections!
Adding pages directly to the site
- Log in to the CMS by navigating to a page on your website and clicking the Direct Edit link.
- Click Content then Pages.

- Click New.

- Select New Page.
- You will be asked to provide information for this new page. You may customize the fields that will appear on your page, to include the subtitle, an image banner, sidebars, and contact information. This can always be edited later.

- Click Create.

Adding and removing editable regions
If you would like to customize the content regions on your page, log in to the CMS.
- Log in to the CMS by navigating to a page on your website and clicking the Direct Edit link.
- Click Content then Pages.

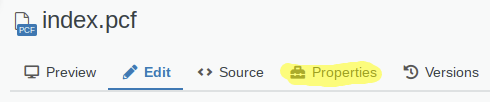
- Check out the page by clicking on the lightbulb from the page-specific controls.

- Click on Properties in the page-specific controls.
- Click on Parameters from the properties tabs.
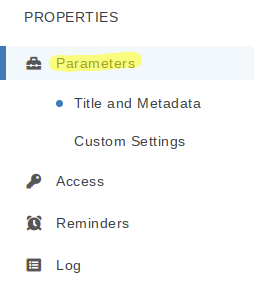
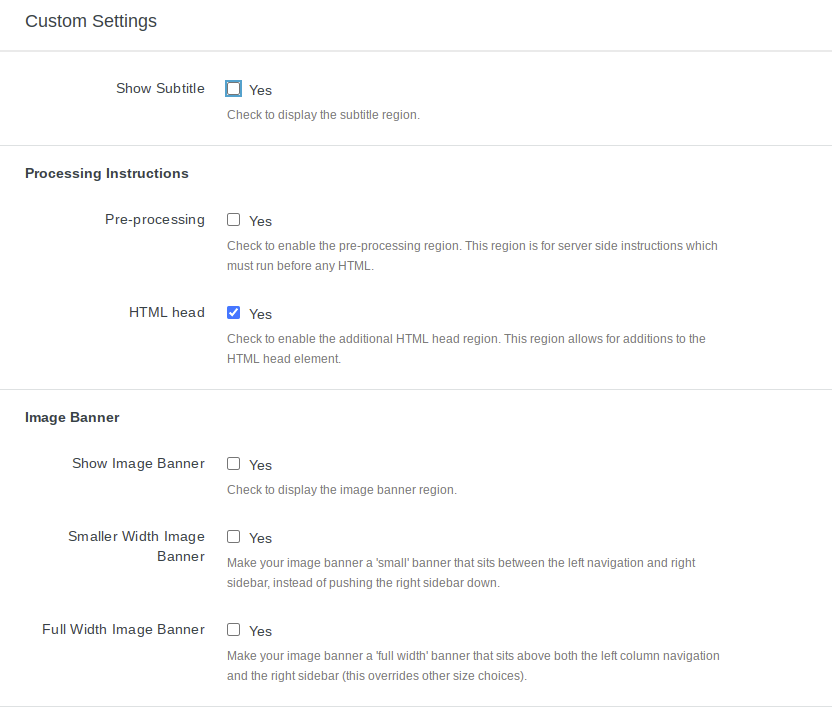
- Under Custom Settings you will be able to display or hide a variety of editable regions, including the subtitle, image banners, and sidebars.
- Be sure to Save your changes when you have finished.
- If you experience rendering problems once you have made changes to a page visit Why aren't my edits taking effect on the live page?.
Want to see this in action?
Re-watch this video segment from our Basic Web Editing training video.