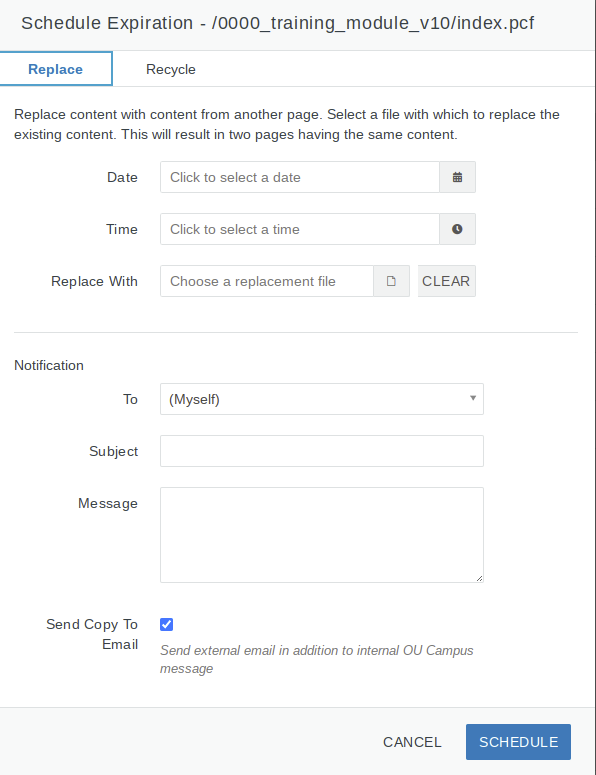
If desired, you can schedule a page to expire at a specific date and time. Keep in mind pages can also be recycled on the staging server or deleted from a production server. This will not delete your web page on the staging server as you may want to update and republish the page at a later time.
- Log in to the CMS by navigating to a page on your website and clicking the Direct Edit link.
- Click Content then Pages.

- Navigate to the web page you wish to expire.
- Click on the three dots to toggle the 'More Actions' menu

- Hover over the file name and option icons will appear to the right. Hover over Publish and click Expire.

- A dialog box will appear asking you to provide further information.

- You will be able to select from two types of expiration events:
- Replace: Selecting this option will schedule to replace the file with the contents of another. To do this, click into the Replace with field and select the replacement file from the resulting file chooser.
- Recycle: Selecting this option will schedule the file to be removed from the staging and production servers and will place the file in the Recycle Bin. It can be restored if needed. Fill in the desired date and time for the scheduled expiration.
- Click Schedule when you have finished.
Want to see this in action?
Re-watch this video segment from our Basic Web Editing training video.