Would you like to have visitors upload files as part of a form or other process? We'll show you how using MSU's OneDrive features.
1. Open OneDrive in your web browser
Follow this link to your Outlook365 account in your web browser and click on the OneDrive cloud icon on the left-hand side near the middle of the page.
2. Navigate to the location of the uploads
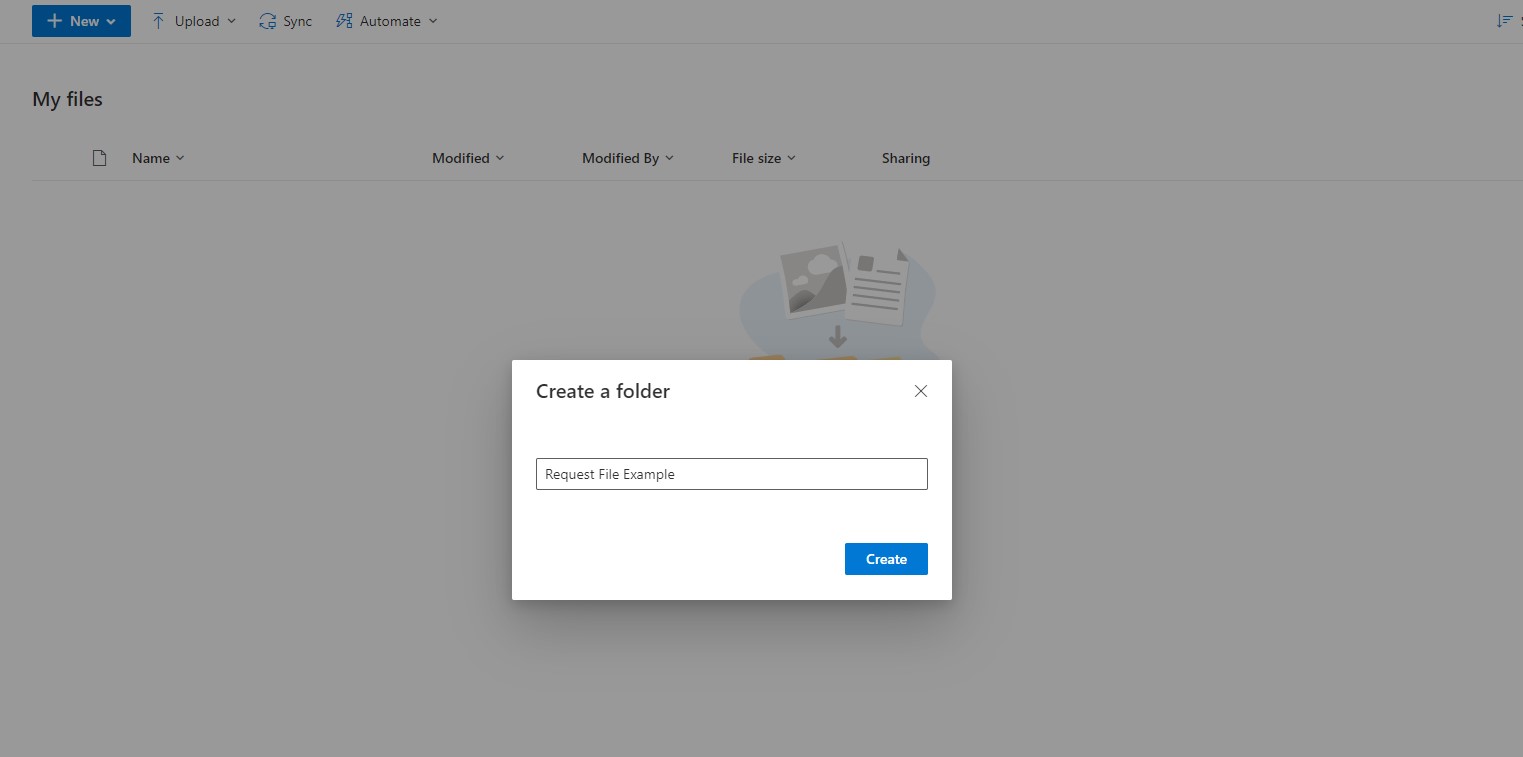
Find a location in your in OneDrive where you would like the uploads to go. If needed, create a new folder for the uploads.

In this photo I am creating a new folder called "Request File Example".
3. Select the folder
Hover over folder name to reveal a select box to the left of the folder icon. Click on the select box.

In this photo I have selected the folder that I created in step 1.
4. Create the request file
With the folder selected, click on the request files button near the top of the page.

5. Add a description
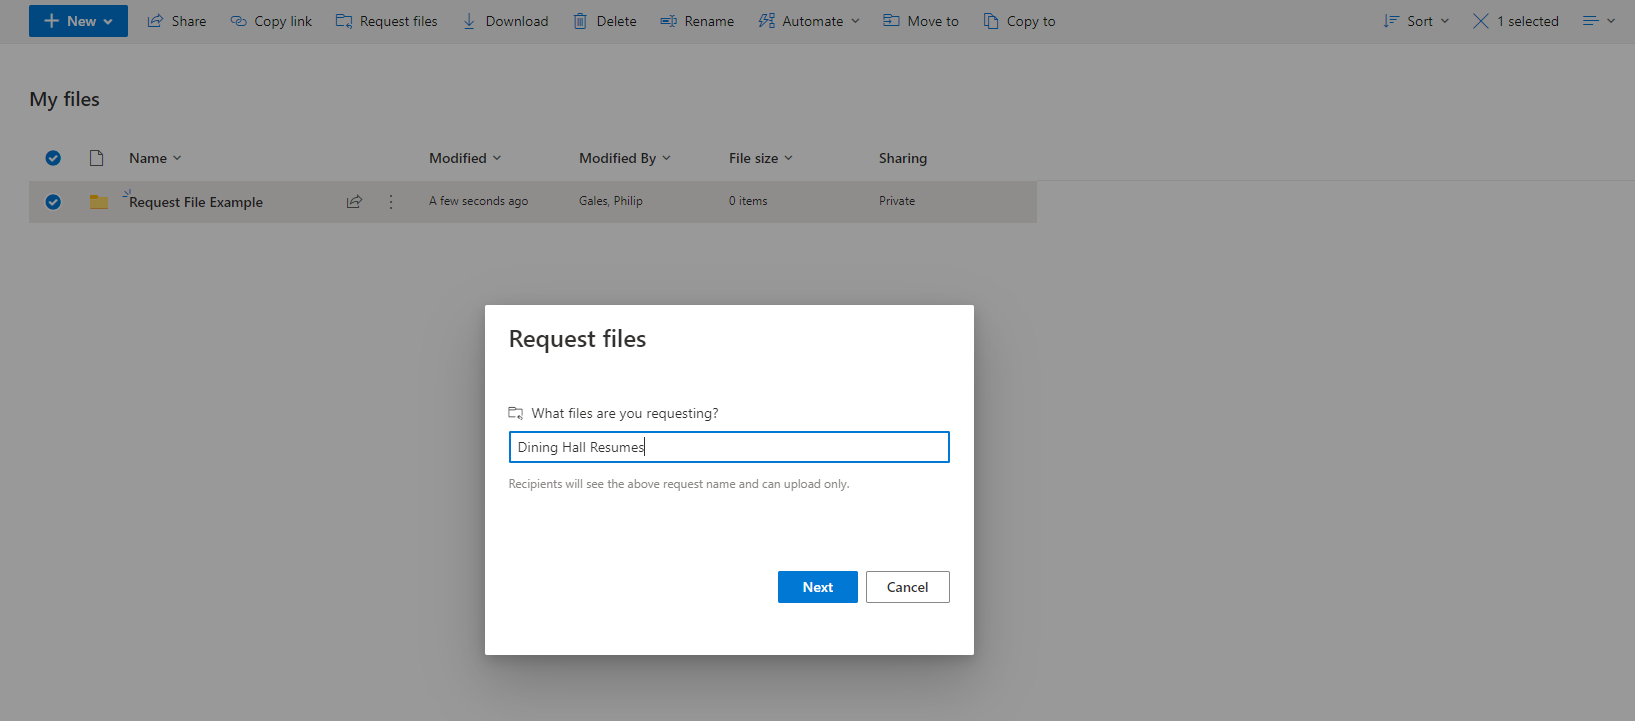
The description you add will later be shown when users are uploading files.

In this photo I added the description "Dining Hall Resumes".
6. Copy the link
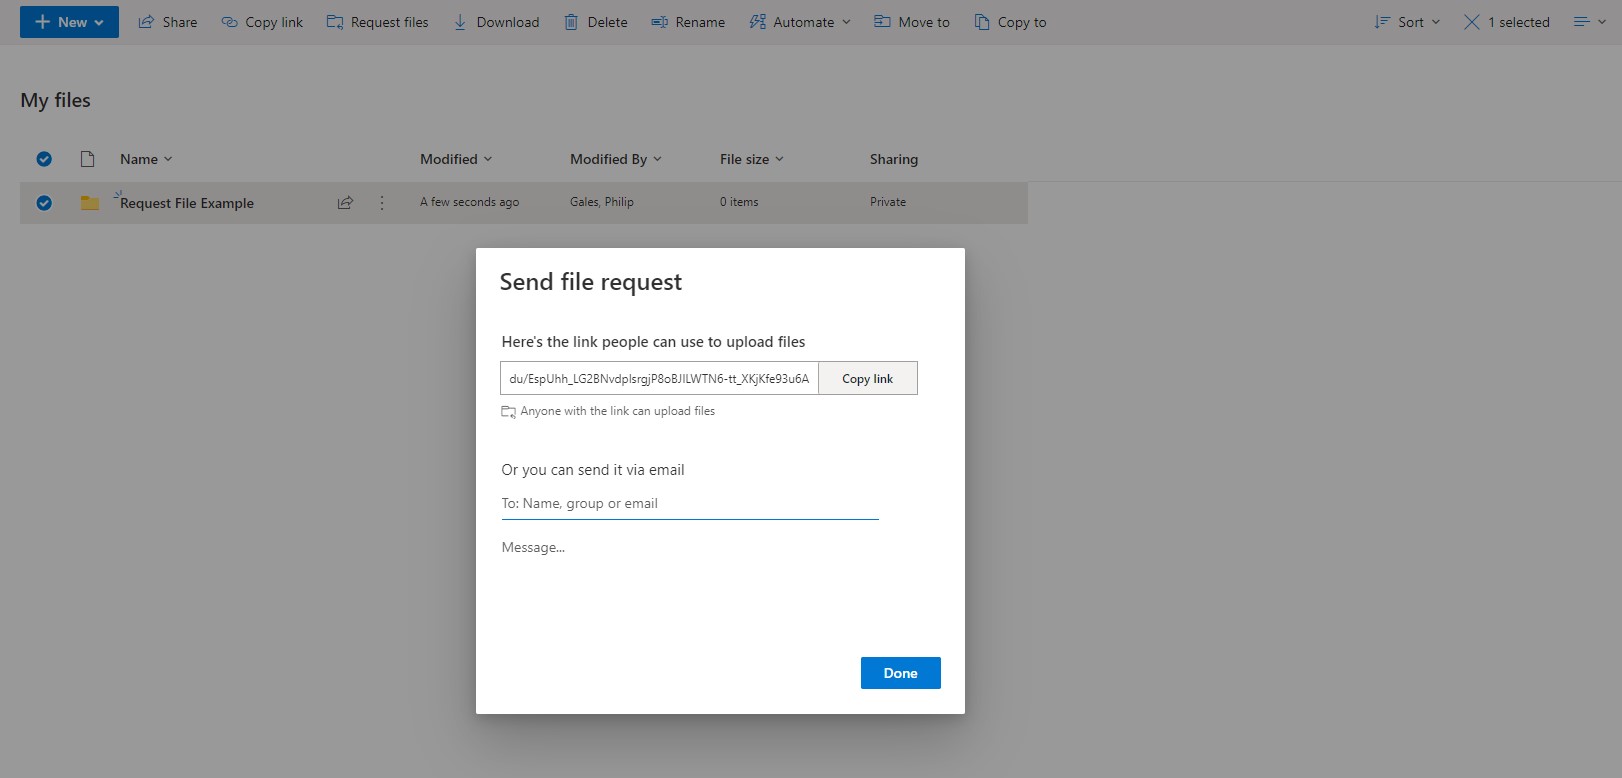
After adding the description you will be presented with a link. Click on the "copy link" button to copy the link. You will need this link since it is where users will go to upload their files.

7. Setup URL redirect on your form
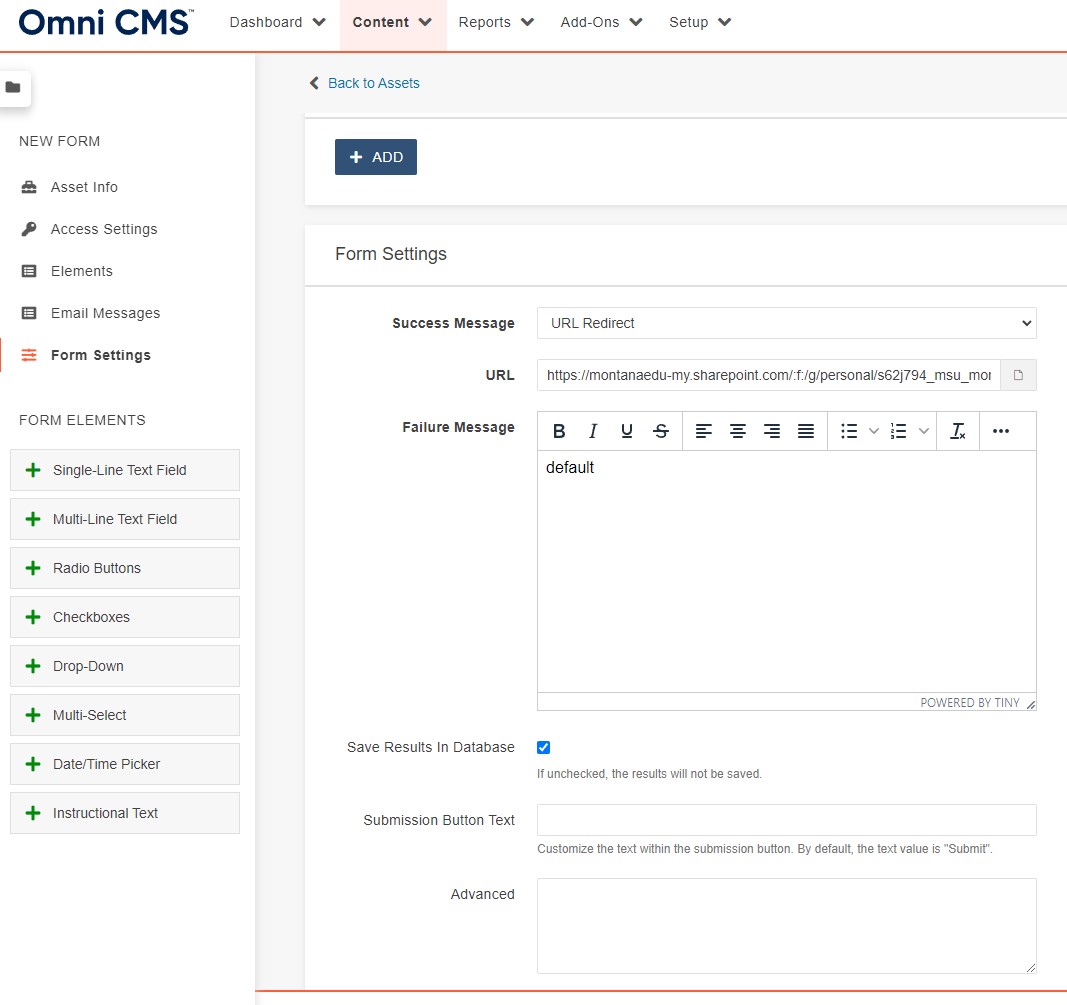
In the form settings section on your form, change the success message to "URL Redirect". In the URL field paste your file request URL.

Now when someone completes the form they will be redirected to the file upload. You can view the live example of this at the following page: https://www.montana.edu/web/example-form.html