Table of contents
Uploading Images
In order to directly use images on your website, you will need to upload them to the server. All of your images should be organized under an Images folder, which can be further organized as needed. For more on organizing your files, check out the article How do I organize my website images, documents, and files?
- Prepare your images for use on the web. For help with this, check out the article Preparing images for the web.
- Log in to the CMS by navigating to a page on your website and clicking the Direct Edit link.
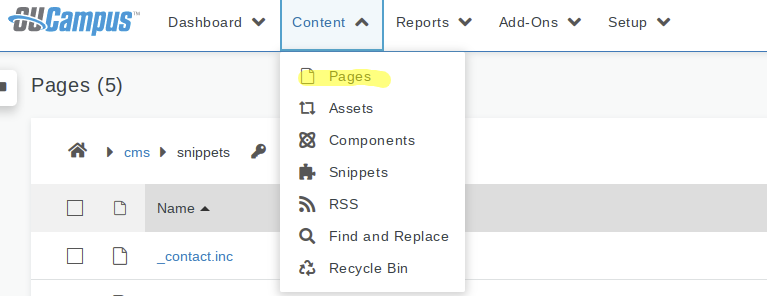
- Click Content then Pages.

- Open the Images folder.
- Click Upload from the Page Specific Controls.

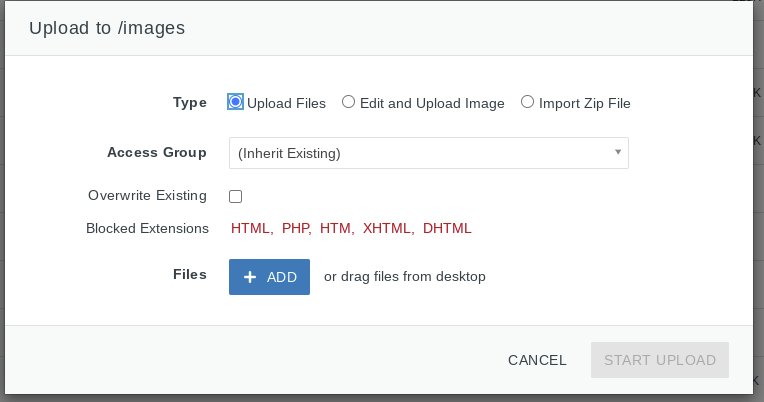
- The Upload dialog box will appear. You may add images in two ways:
- For less than five images, simply drag the files from your computer into the Upload dialog.
- For more than five images, please send your computer files to a zipped folder. After doing this, click Import Zip File from the Upload dialog and click Add to browse for your folder.

-
If you are uploading revised copies of files already uploaded to the site, remember to click Overwrite Existing Files.

- Click Start Upload.
- You will need to review your files and ensure no errors have been found. This may include file names. Please remember that special characters are not accepted.
- Remember the final step is to publish all of your newly added images. See Publishing Images and Documents for more information.
Adding images to a page
While the CMS Editor has a preset Insert/Edit Image tool, Web & Digital Communications has created alternative tools for adding images to your web page, accessed through the Snippets. The Snippet tool allows you to add a stylized design block to the web page without having to customize the HTML. Using the Snippet tool, you can easily create clean faculty listing pages, photos with captions, and navigation images. We have a number of image-related Snippets for you to choose from, including:
- Image with Description
- Image with Titles and Description
- Image on Right (with caption)
- Image on Right (with no caption)
- Image on Left (with caption)
- Image on Left (with no caption)
- Faculty/Staff Listing
- Image with Content and Header
- Image with Content
- Image with Label (Translucent)
- Image with Label
- Image
This article will cover adding an image either directly through the Insert/Edit Image tool or adding an image into an inserted Snippet. If you are trying to insert a Snippet, please see the help section dedicated to Snippets.
Inserting images: the process
- Open the CMS Editor for the desired editable region.

- Position the cursor where the image should be inserted in your text. This may be over the top of an example photo used in the Snippet.
- Click the Insert/Edit Image icon.

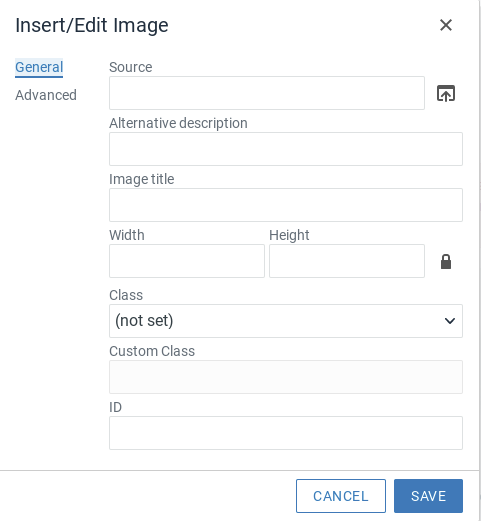
- A dialog box will appear prompting you to provide further information.

- Click the Browse icon to select your image.

- A second dialog box will appear prompting you to select an image. Please ensure you are in the Staging environment.

- Navigate the folder structure via the breadcrumb links. You will only be able to select images uploaded to sites that you have access to.
- Click on the image once to preview it. Click twice to select. Alternatively, you may click Insert.

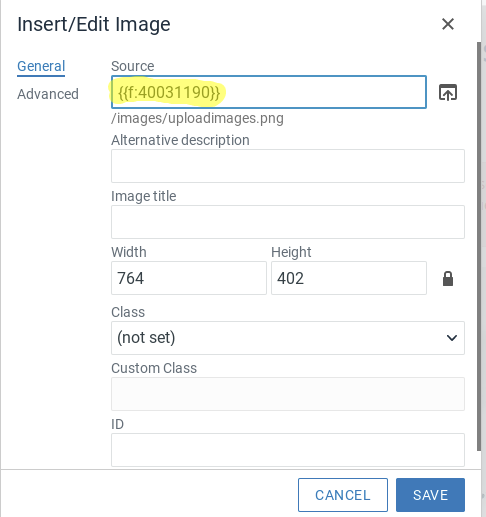
- The image will be added to the Insert dialog box and a dependency tag will be used to refer to the image. The dependency tag will ensure your image displays regardless of where it is moved within the CMS folder system.

- Enter a clear description in the Image Description. This description fills the accessibility requirement for alternative text. The general rule for this is, "what you would tell someone if they could not see the image?" For more on this, see Making images accessible with image descriptions.
- Click OK.
- Once you have finished, save and publish your page. If you experience rendering problems on the live page check out our article Why aren't my edits taking effect on the live page?.
A few words about the Appearance tab
The Insert/Edit Image tool includes the Appearance tab, which allows users to customize the display dimensions for an image. This does not affect the actual image file dimensions, but only alters the size it will be displayed as. For information about image dimensions, either actual or display, check out the article Preparing images for the web.
Editing images
The image and its details can be modified after insertion on a page by clicking the Insert/Edit Image icon, making the necessary edits, and clicking update.
- Open the CMS Editor for the desired editable region.

- Click on the image you need to edit.
- Click the Insert/Edit Image icon.

- A dialog box will appear.

- Proceed by making your edits, perhaps changing the image or changing the image description.
- When you have finished, click Update.
If you experience rendering problems once you have made changes to a page visit Why aren't my edits taking effect on the live page?.
Deleting images
To delete an image inserted on your page simply click on the image from the CMS Editor and click delete on your keyboard.
If you experience rendering problems once you have made changes to a page check our article My CMS edits are not showing up on the live page!
Want to see this in action?
Re-watch this video segment from our Basic Web Editing training video.